Many newbies to the Internet are use to conference calls using standard telephones or cell phones. Folks have tried to record these conversations only to be disappointed with the quality and lack of bandwidth of the audio. Saving the recording is possible but who wants to save a low quality recording for future broadcasting and archives for use in the future.
Forget the standard telephone and cell phone
Use the Internet. Yes, you need a reasonable good Internet connection. Even a marginal Internet connection can provide high quality audio superior to a standard telephone or cell phone.
Start With A Good Quality Microphone
Ditch the built in computer microphone. Ditch the integrated microphone you might use with some earbuds that you use with your cell phone and have plugged into your computer.
A high quality microphone can be very, very expensive. Beginners might try spending under a hundred dollars and still be surprised at the quality it may producer. We have often recommended to beginners the FiFine USB Podcast Microphone. There are a host of other inexpensive microphones that can work as well. Once you progress beyond “beginners”, you may want to invest in even better microphones, boom arms, noise cancelling and pop filters. Our recommendation is start with the basics until you are sure you are comfortable with all the processes.
Headsets to Reduce Echo and Feedback

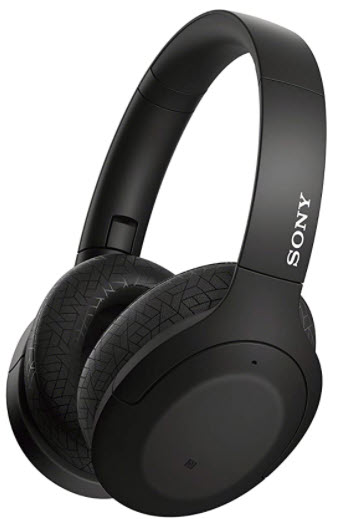
Don’t use earbuds but invest in a good set of over the ear headphones. Our favorite is the OneOdio Wired Over Ear Headphones. Many headphones now include a built in microphone, but don’t use it. Use the higher quality microphone mentioned above. If you can afford noise cancelling headphones, great.
Do NOT use the built in microphone/speaker of the computer itself. Your computer drivers are constantly trying to cancel your microphone’s audio from feeding back through the computer speakers. Generally your computer does a great job if you are using Zoom without an external microphone or wired headset, but it is not great if you are going to try recording a group conversation.
Recommendations
The Platform
Zoom
Before getting to deep into this process, we always encourage folks to simply try their audio system out with the common platform called Zoom. Each participant should have their own USB microphone and wired external headset on. Each video will now show folks talking into their microphone with the headset over their ears. When they activate their Zoom invite, you need to make sure that they click on their Audio and Video icons so that they are using their external devices.
Once everyone is online, the host can record the Zoom session. The Zoom session will create a video recording and a separate audio recording.
CleanFeed
Once you have graduated using Zoom, start using a platform such as CleanFeed. There are many other services like this, so please take the time to explore. The standard CleanFeed account is completely FREE. If you need all the bells and whistles, be my guest. FREE is what we like.
Editing the Audio
CleanFeed and other services provide some type of editing of the final recording, but we recommend a very, very basic software called the AVS Audio Editor. You can go crazy buying audio editing software from high end companies such as Adobe, but you just might be surprised at what the AVS software does for the price.
The World is your Oyster
Now that you have a semi-professional recording, the world can start opening up to podcasting, legacy archiving of historical interviews, selling interviews to news and production organizations. But our guess is that you might want to start podcasting.

